Anatomy of a Night Photograph No. 1
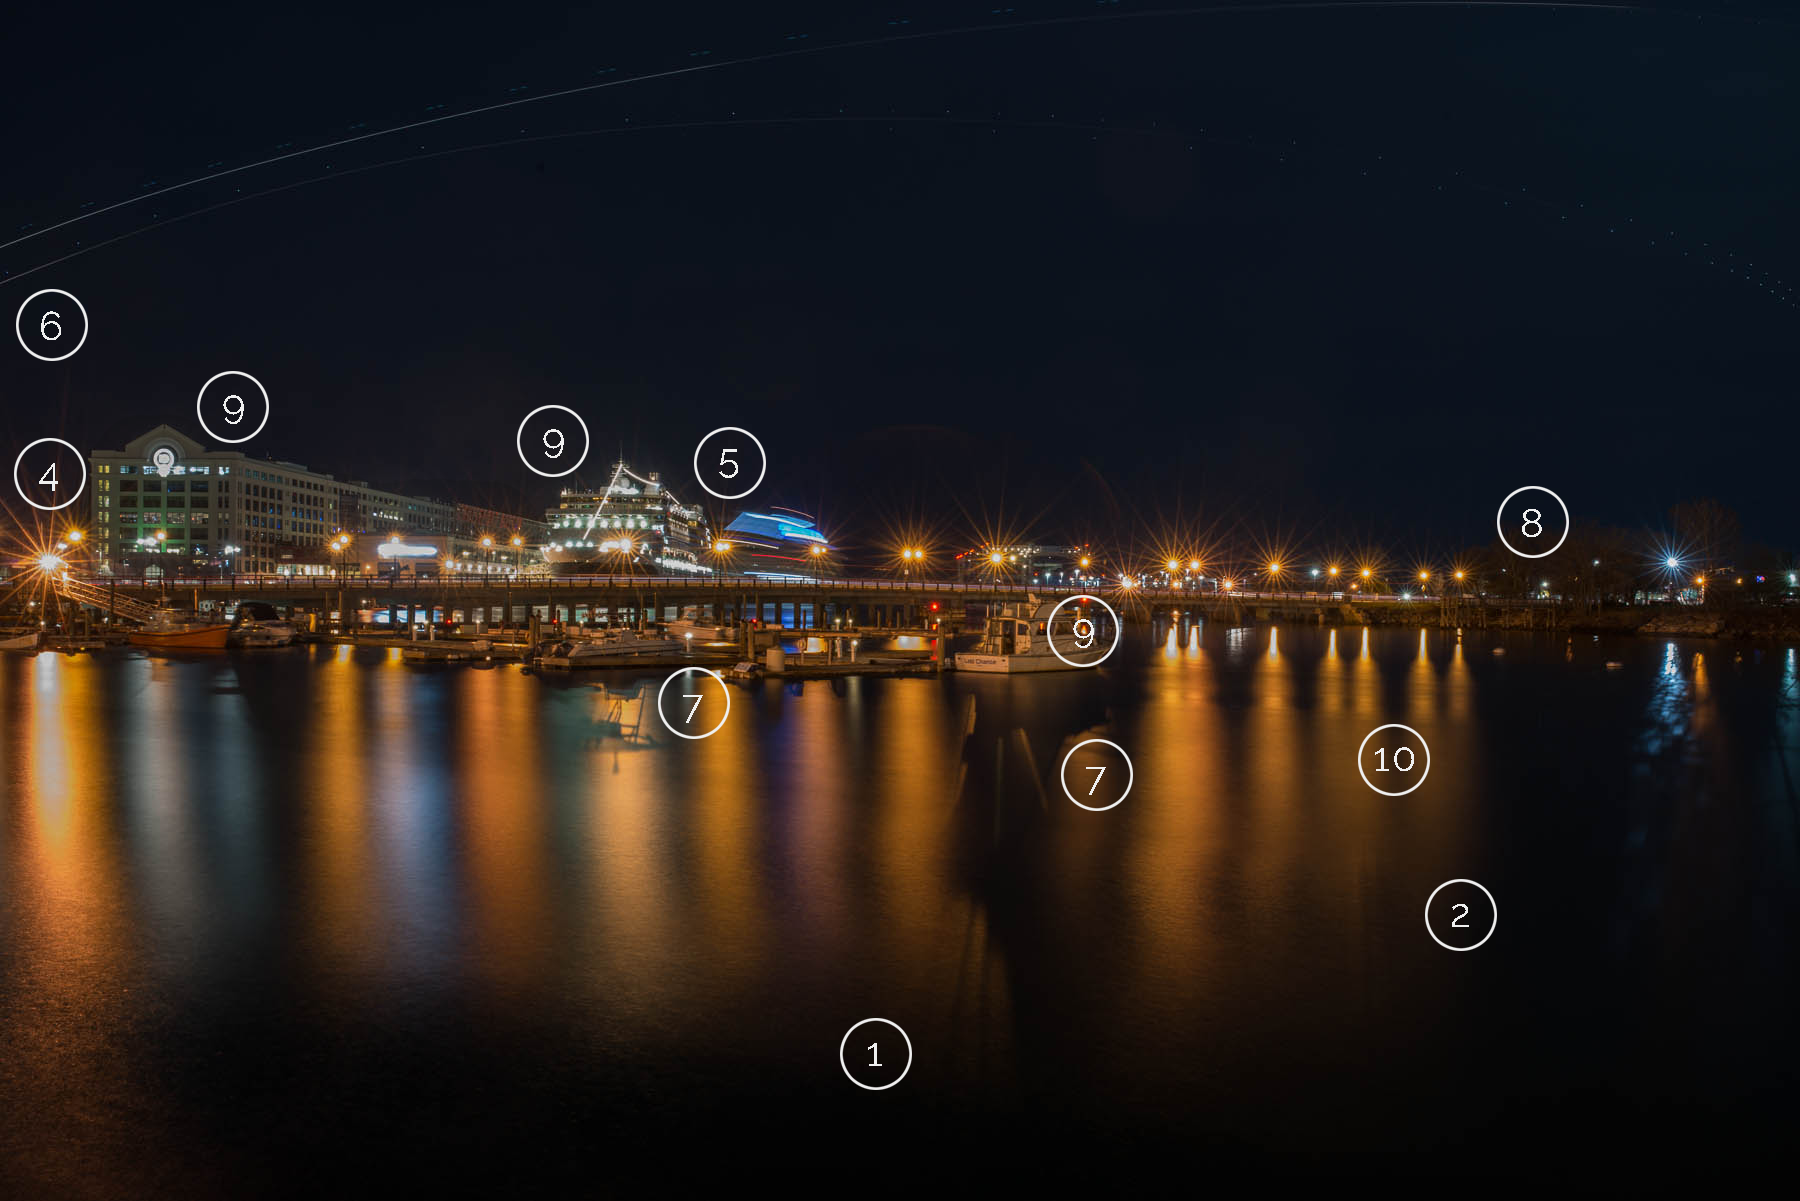
I wanted to share a photograph that I made to describe how I approach night photography. It is a useful image for this purpose, but honestly, I don't love it. It doesn't have enough mojo and it won't go in my portfolio.
This photograph was made in South Boston, on April 28, 2018 at 8:36PM. In the background, from left to right is the Boston Design Center, Black Falcon Cruise Terminal, and Conley Container Terminal. The bridge is on Summer Street.
This is one of my favorite spots in Boston to photograph at night. I'm often standing on the platform of the Black Falcon Cruise Terminal, photographing across the water to the Conley Container Terminal. But on this night, there were a couple of cruise ships in port, so I decided to go where I could get a bit of a wider shot.
The points below are in no particular order.
- Layering and Vision. This is where I start with just about every photo, at night or otherwise.
- Dark to Light.
- Smooth Water
- Light Starbursts. These are a side-effect of using a small aperture. There's no filter or post-production used to get this effect. I like them, but really they're just a side-effect.
- Object Movement.
- Airplanes. Okay, so this is really about object movement too, but I really like getting an airplane in a night photo. Logan International Airport is just to the left of this scene. I waited until an airplane took off and was about to enter the frame before I started the exposure. The white line on top is one plane, and the white line on the bottom is another that appeared a minute after the first. You can see that they take different courses. If you look closely, you can see dotted lines next to the solid white lines. The solid white line is the plane's headlights, and the dotted lines are different colored flashing lights on the wings.
- Object Reflections. There's a reflection of the boat in the water, and another reflection of a boat in the center of the frame. The effect is enhanced by the fact that the water seems so smooth. The smooth water effect is accomplished by using a long exposure. The longer the exposure, the smoother, more "glassy" and reflective the water looks. Obviously, I don't get object reflections every time I make a photograph at night, nor every time that I make a photograph of water at night. But, when they're there, they add a nice effect.
- Line. It brings you across the picture.
- Resting Point
- Smooth Water
The technical stuff: Nikon D800, Sigma Art 35mm f/1.4 at f/16, ISO 50, 139 seconds (just over 2 minutes).